
This Christmas floral arrangement tutorial is so simple, anyone can do it! Make them for your home or give as a festive and beautiful gift. Grab a few bundles of inexpensive grocery store flowers and greenery, or forage them, and learn how to make the prettiest Christmas flower arrangement!

When I was young, my mom was always arranging her own flower arrangements. We had beautiful flowers, like peonies and roses, that she cut from the yard during spring. It always amazed me at how she could make a beautiful centerpiece for the table out of just a few simple flower cuttings! Or if she had a bouquet with some flowers that were wilting, she would rearrange the flowers, take out the dying ones, and it was suddenly like a brand new bouquet again.
As an adult, I love having fresh flowers in my house. I think fresh flowers instantly brings so much life, beauty and peace into any space. During the winter, even though there isn’t much going on outside, I still like to include fresh flowers in my home. I think adding fresh flowers that compliment your Christmas or winter decor can make a huge difference in helping things feel more “alive” even when it doesn’t look that way outside.
This tutorial for and easy DIY Christmas flower arrangement is so simple. It costs little to nothing depending on what foliage you have nearby or in your own backyard. I grabbed three bunches from the grocery store and was able to create one large bouquet and two smaller ones. I also was left with extra greenery to add when wrapping presents!
I’m excited to share this quick and easy method on how to make the prettiest Christmas floral arrangement!
Gather your tools:
Choosing the flowers/foliage for your Christmas Flower Arrangement
For my three Christmas flower arrangements, I spent about $11. I chose one large bunch of deep red mums, a bundle of mixed greenery with cedar and pine, and one bunch of eucalyptus. I wanted my bouquets to look warm and festive so it would go along with my Christmas decor which consists of deep reds, greens, and creams. There were no cream colored flowers at the store that I liked so I decided to keep it simple and just feature the gorgeous red mums.
When you are choosing your flowers for your floral arrangements, keep in mind your home and the decor color palette. Try to pick things that compliment what you already have. This is your chance to be creative so grab what catches your eye.
After you choose the flowers, grab some greenery to boost up your arrangement and give it more depth. If you have access to cedar, pine or eucalyptus, I totally recommend foraging those. That will make these lovely arrangements super cheap or even free! I love that you don’t have to spend a lot to create a stunning arrangement to fill your home for Christmas.
How to make a Christmas Flower Arrangement
Begin by laying all of your flowers and greenery out on a big open surface. Gather your vases, mason jars, or stoneware pitchers. You will also need pruning shears – I needed straight blade as well as curved shears. And that is it! You are ready to begin.

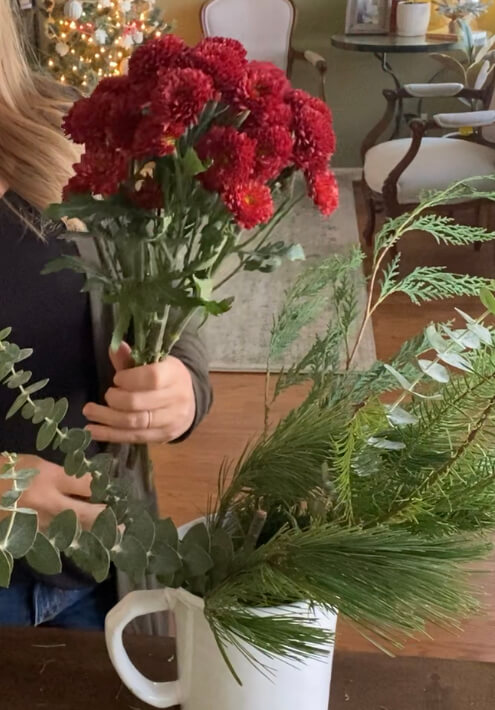
Start by making a bundle and measure the height
Begin your bouquet by gathering a mixture of flowers and greenery in your hands into an arrangement of what you generally would like it to look like. This is a very “rough draft” and is just getting you started on the arrangement/sets the height of the flowers.
A good rule of thumb for arranging your own flowers is to make the arrangement 1¹/₂ to 2 times the size of the container. Keep the center/focal part of flowers in a rounded dome shape. The greenery will be used mostly around the flowers to add accents and contrasts to the flowers.

Avoid this mistake…
Try to avoid making the arrangement too tall for the vase you have chosen. If it is too tall, the proportions of the vase and the flowers will look off balanced and awkward. The way I measure when trying to determine the height and where to cut the stems is by holding the bouquet up to the side of the vase. I then adjust how high I want the bunch to be, and then cut where the stems would hit the bottom of the vase.
This might take a few adjustments, but once you have your height set for the main portion of the bouquet, it is easy to just add the greenery filler around it.
Add the greenery and arrange!
Once you are satisfied with the height of the main flower part, play with the positioning of the greenery around it! I like to spread the different types of greenery around and create visual interest by varying the heights.
If there is a “front” and “back” to your arrangement (like one that will be against a wall vs in the middle of a table), then I like to put taller sprigs of green in towards the back. With the taller greens in the back, taper the rest of the greens toward the front of the floral arrangement.

If you have a larger arrangement that will be a centerpiece, like the one I did in the white pitcher, it is best to balance the greenery so that it looks balanced from any angle. Play around with it until you get the desired look.

Clean the stems! This is a MUST.
To avoid your arrangement going bad in a day or two, you MUST clean the stems! Whatever part of the stem that is going to be submerged in water needs to be cleaned of any leaves/needles/foliage. It is super simple to clean the stem using the straight blade shears. For the cedar, I did have to use the heavier duty curved shears. Everything else I just used the small straight blade ones for.
I cleaned the stems about 3-4 inches for the quart sized mason jars. For the larger pitcher arrangement, I cleaned the stems 5-6 inches. The main thing is to make sure no leaves will be touching the water.

Why is this important for your Christmas floral arrangement?
Cleaning the stems off is very important! It prevents them from rotting in the water which causes the rest of the flowers to go bad. Also, mold can grow if the leaves are left to disintegrate in the water. Just do it, clean your stems. It will make a huge difference! Plus, if you are using a glass jar or vase, it looks so much cleaner with the stems bare.

Final tips for your DIY Christmas Flower Arrangement:
- Replace the water every 2-3 days to keep the arrangement fresh
- Trim the ends of the stems every 4 days. Cut at 45-degree angle to allow maximum surface area for water to nourish the flowers.
- Add aspirin to the water to extend the life of the flowers.
- Tie some twine around the mason jar and add a tag to gift to a friend!
- Use the leftover green cuttings when wrapping presents. You can also add them on top of cloth napkins for your table setting at Christmas dinner!
Pin it for later!

You might also enjoy this other DIY project!
DIY All-Natural Foaming Hand Soap with FREE printable labels
I LOVE having fresh flowers in the house! You have inspired me to get some and make an arrangement. Perfect for the natural Christmas decor look. Thank you for sharing!
Yay!! I’m glad you liked the post, happy arranging! 🙂